Saturday, June 30, 2012

Saturday at Beverly's


Today two people wanted to know how to make a piano hinge book.  That made me very happy.  It feels good to pass on knowledge.    I was up until early this morning making flowers for an arrangement.  They were made using the spellbinders scalloped hearts.  It is a lot more work using the die cut but it also gives six size of hearts.  So I was able to make three sizes of hearts with the left over paper.  Also if  you die cut four sheets at a time they will also emboss becaue it is so thick.  If you try die cutting six sheets two won't cut but it leaves a cool impression in the heart shape made of tiny wrinkles.  I love this effect and plan on using it in the future.  The flowers were made using the paper flower tutorial on this blog.  After hot gluing the flowers together I then brushed the edges with a gold ink pad.  That really brought them to life.  Now they look more like flowers then paper.  I also finished a ATC but if I told anyone they would have to shoot me : )  Three more ATCs and I will be finished with the swap.


Today Beverly's had a 30% off everything day.  Three years ago I went to one of these sales and they had to limit how many people could enter the store.  Today the parking lot was almost empty.  Very sad.  While I was there I bought some fabric to finish a project.  Also bought some gingham to practise smocking, the even design makes it easier to make the gathers.  Plus I found some BoBunny paper!  All for under $14.00.  BoBunny ATC?

Anyway that was enough excitement for a whole week so I'm going to rest and start on projects again tomorrow.  I hope everyone has a lovely evening.

Friday, June 29, 2012

Down to the wire or Fair Entries 2012

July 5th is the turn in date for the county fair and I have so much to work on.  With this piece I'm hoping to win the jewelry blue ribbon.  I can't get a picture of this that shows how beautiful the stones and copper are together.  I also made the clasp.


Dragons Blood Necklace.

.

Dragons Blood Donut.


The last order from Fire Mountain Gems included these stones.  When I saw the dragons blood I grabbed my tools and in an hour I had this beautiful piece.  But I didn't hang the donut correctly so I really need to fix that if I want to win.  My first year at the Fair I took first place neckiaces with a crocheted necklace.  I lost the picture but it was simular to this lovely necklace.


Silver wire crocheted necklace wih red and clear cystals.

I didn't expect to win my first time entering and there were three cases full of jewelry to compete with but I did.  The last year that I entered I only took second place in several in several jewelry catagories, not bad at all.  I'm also entering these pieces.


All of these plus a couple others I don't have pictures for.  That is one of the great things about journaling it forces me to take pictures of my work.

I'm also entering a sewing box I made from left over bookboard.  I figured out the biggest box I could make using the bookboard scraps I had and then covered it with cloth.  It is going to be a tutorial but I have to get it written.  I can't find a picure so I will have to get some.

The dragonfly pincushion got ruined by my slip of the scissors, so I need to see if  I can save it.  I'm also entering a needle case and a stumpwork picture of flowers and a butterfly.  In all 17 entries, not to bad for a year.

Today I finished a ATC but it is a surprise.  So no picture yet, actually I forgot to scan them before they were mailed.

My boyfriend found a 7 volumn set of art works from the Metropolitan Museum of Fine Art in minature.  I'm going to have fun with those pictures.  They are just the right size for ATCs.  What I do is scan or copy them and then print them.  Then to keep them looking nice I spray the finished pieces with hairspray, safer to do this before making the card!  I came up with that trick when laser printers were new and without the spray toner would "pop" off the cardstock.   The hair spray technique usually works except for some handmade papers.

I also went out today and stopped at Joanne's Fabrics to get more ideas for ATCs.  While I was shopping my boyfriend bought a new computer and monitor.  Now I have some neat boxes to decorate and store crafts supplies.  So we are both happy.  I love the way that computer boxes close, nice and secure.  So todays craft is to cover a computer box and make it look great.

First thing I did was to pop open the sides of the box.  Then I started laying images on the box.  Instead I decided to use some scraps of old wallpaper.  Once it was glued I cut around the edges of the box getting any bits of left over paper.  Finally I decided on a Kabuki print and glued it to the top.  A computer box lives on to become a decorative storage box.


Thursday, June 28, 2012

Today we have no internet access so I am noting all this in notepad to post later.  I had some energy today so I worked on cleaning up the mess I've made in the last few days.  Saturday I teach piano hinge book making. So today I cut the paper I need for a book.  The way I cut the paper it gave me enough paper for another smaller book.  The trimmings were torn and saved to be colored pulp for papermaking.  No paper wasted.

I also worked on the cat  ATC for the swap.  Hope to get it in the mail tomorrow.  Can't show what I made because it is a surprise.  Down to 4 ATCs to make.

Wednesday, June 27, 2012

Not feeling very creative

Seems that creativity can flee when you don't want it to.  Today hasn't been a very creative one for me.  I signed up on the ATC swap for a new partner.  So that means I need to make 5 ATCs.  There is so much to get ready for the county fair!  Still haven't finished the gray shawl and startched it yet.  Saturday I am teaching a class at the local Beverlys craft store on book binding.  So I need to make another book and have a third book to make on Saturday.   But all I can think about is sitting and crocheting.  So I started a smalll doily but got stuck on the instructions.  So I got out some paper and made a new ATC.


It is a little hard to see but the background is from a book of images in Medieval manuscripts.  The image is of a bakers shop and over it I stuck an celtic angel.  The angels face is in side a round paper clip on top of the wings.  Then I placed an image of a celtic animal and some 3D lettering that says celts.  I will get it scanned later.  To bad I can't think of a cat theme so I can finish the swap!  Well I will try and make another card tonight.


Tuesday, June 26, 2012

ATC's

Updated June 26, 2012

I'm sure most of the people who read this knows what an ATC is but just in case, it stands for Artist Trading Card.  They are 2.5 x 3.5 cards that people design a piece of art on.  The swap was a lot harder then I thought it would be.  The swap works using a claim system.  The moderator starts by putting a list of their favorite things.  Then someone in the swap claims the moderator for one of the items on the list, and then they post their favorite things.  Then the swap keeps going, as people finish and their card is received they can then claim again.  Clear as mud!  Somehow it didn't occur to me that drawing would be involved.  Don't know where my brain was that time!  So here I am committing to a project I could do!  I almost quit but decided to give it a try and then drop out.

The card I claimed was for giraffes.  So I went searching for pictures of giraffes so I could at least get an idea of what they look like.  I used an outline and then colored in the spots in light brown ink.  Because I shake I had to restart the card several times.  Then I realized if I stopped after a minute of drawing and rested my hand the lines were much smoother.  It wasn't as nice as I wanted but it will have to do.  I can't spend my life drawing giraffes!  So today I am going to mail it, but just for fun I'm going to make and decorate an envelope and post it here as my creative project for today.


ATCs


It has gotten a little easier making ATCs but it is interesting how such a small piece of card can be so much work.  I guess art has no size.  Unfortunately they are surprises so they will be posted later.  But I can post my first ATC.  The theme was giraffe and was for a child's room.  So I had just finnished reading the Hobbit and remembered that Tolkien had written a story about a Girrabbit.
I don't remember the story but the girrabbit was part giraffe and part rabbit.  So I tried to draw it as best I could remember.  I wanted it to be a letter card like a flash card.  So I got an image of a bunny and a giraffe and used them as a model.  Then I drew the girabbit and lettered around it to add interest and because not that many people have probably read the story and be confused by the strange creature.  So here is the first ATC I made.  It is done in black ink and brown ink for the spots.  It took about 5 tries to make.  Silly but cute. 


Blue Crystal Necklace

After all the paper crafts I've done recently it was time to work on some jewelry.  Jewelry seems to make itself for me.  So I just picked some random blue beads and used a simple repeating sequence.  This was the first time that I used the Zebra silver wire for wire wrapping and I was a bit disappointed.  The wire I used was Zebra's 20 gauge silver with a copper core.  For some reason it seemed more flexible than their 20 gauge copper wire.   So next time I make something with the silver I plan on using 18 gauge.  Now I need to try their gold colored wire and see if that has the same problem.  Being soft isn't really a problem except that I bought four rolls each of 20 gauge in the silver, gold and copper. That is a 180 yards of to soft wire!  In any case the necklace is lovely, it uses two different sizes of medium blue crystals.  Some of the crystals have an AB finish for extra interest..  To lighten up the piece I used medium sized clear crystal   The necklace is about 30 inches in lenght so it can go over the head and has no clasp. 


Monday, June 25, 2012

Pergamano or Parchment Craft

Today I started playing with the pergamano book I received through a great website www.paperbackswap.com.  I've gotten a lot of great books through the site.  You simply list the books you want to give up and the ones you want.  When you send a book out you get a credit towards a book you want.  I lost my copy of Parchment Craft years ago and was happy to find it on the site.

So now that I have an excuse to play with the pergamano tools again.  The tools are needles in a handle and embossing tools.  Today I copied a simple pattern to vellum and practiced on it.  The basics of the craft is to outline an image with white or gold ink using a old fashion pen.  I cheat and use a white gel pen.  Next you place the image right side down and use the embossing tools on the image and it causes the work to pop up on the rightside.  It also causes the vellum paper to become white where it has been embossed.  Then you use the needle tools to create patterns and in some cases punch areas away.  It is like doing white work embroidery only with paper.


Embossed pattern.

Unfortunately the embossing tool went through the vellum in some spots.     Embossing is done by placing the paper on a soft mat.  But even with the mat and thick vellum it is easy to punch through the paper.


The work can be colored on the backside for more interest.


Right side after coloring in the image.

I enjoy the challenge of pergamano and I think I will look for some white work embroidery patterns and see what I can come up with.  This might make a cute ATC.


Back to Jewelry I Think

I love making jewelry it is so much easier then paper crafts right now.  But what I really need to do is organize my craft supplies.  Still haven't found any of my die cuts,  I only have around 10 so they could be hiding anywhere.  Hopefully they didn't get eaten by the dryer.  Can you image somewhere someone opens their dryer and die cuts fall out.  I should really rest but so much needs to be done I at least have to try and do something today.

Sunday, June 24, 2012

Today's Challenge ATCs part 2

Today's challenge is to make another three ATCs.  Yesterday I made a huge mess dragging out rubber stamps and inks and tons of other stuff.  So today I just grabbed some random stamps and paper, sometimes it helps having fewer choices.  I can't find my Jim Holtz die cuts!  I had such a cool idea!  After a rest I will look again.  Now to look through my bag of stuff.  My bag of stuff contains the scraps and pieces left over from other projects.  When I make something using clipart I fill the page with images to print.  It feels horrible just to print out one image and waste cardstock.  So that saves me time later and I have images I use a lot of so it works great.  Even though I shake a lot some days, I'm very good at cutting, the trick is to move the paper and not the scissors.  So clip art is a major source of inspiration.

ATC # 4

Got out a card that I cut from watercolor paper and made sure it fit in a card sleeve.  Learned to do that yesterday, don't trust you've cut the card perfectly.  Then I cut some lace that I got at the fabric dollar store.  Clipped the netting around the fabric edge.  I decided not to use the edge and instead arranged the lace motif on the card and glued it down.  While I waited for the card to dry, I started playing with what I wanted to add to it.  I needed to glue the edges of the card again.  The lace came out rather well.  So I found a beautiful flower whose name I cannot spell.  It is pale pink which I thought would look nice.  But it didn't, that is collage for you, never know what will work until you try!  At this point I gave up and just sat cutting out bits and pieces.  Then I realized I was drawn to certain colors and shapes.  So it occurred to me to try a central theme and color and make the ATCs as a group.  I went to the Gutenberg Project and
downloaded Alice in wonderland images.  Narrowed it down to one image and started playing again.  I cut some of the Alices and tore others.  The image was a sepia kind of color so I colored two images with colored pencils.  Then I cut some BoBunny paper (black and white) for the background.  Pasted an Alice down and then I used the flower I cut out earlier, still can't spell its name.  Next I put a rose rub on over the whole image. This is what it looks like.


ATC # 5

First I glued another BoBunny (black and white) background to another card.  Glued a large moth from the Mariposa card pack.  Colored Alice so she has red hair and a light blue dress. Glued Alice on top so she has wings.  Gave her a crown made from a rose bush from another picture in the book.  This is a lot like the angels and fairies that people like to make but still cute.  I may take and use Stickles on her later.


ATC # 6 
Was a happy accident.  I took a section of a die cut flower and folded it over a card and it looks cool.  So I glued it on the card.  Colored it green on the parts that were white.  Colored other parts green also.  Next I glued textured vellum over the card.  This caused the card to fade and the texture is cool but didn't show on the scan. Then I glued a clock over that and Alice on top.  Cut the rosebush to be a bouquet for Alice to hold.  Again has been done to death but cute.


The project is complete and now that I've had some practice I'm ready for the swap!

Saturday, June 23, 2012

Today's Challenge ATCs

Today's Challenge is to make 6 ATCs this weekend.  Writing the tutorial yesterday was exhausting.  Even though I can edit pictures quickly, writing the directions was hard.  Somehow two of the instructions didn't have pictures so I have to do it again!  So I would rather work on something creative rather than back tracking. 

ATC number 1.

It was actually a collaged card that no one liked except me, so I cut out a template so I could see the best way to cut it.  The template really made it easy to cut out.  Then I edged it in gold ink.


Original card.


ATC

 
ATC number 2.

I liked to buy clip art packages over the Internet, unfortunately the site I use is closing up.  One of my favorite clip art designers is Debbie Mumm.  The poppy is cut from a background she created.  Just because it isn't a whole poppy is no reason not to use it!  I wanted to make the contrast between the poppy and the background pop.  So I doodled a background image and water colored it in black.  Nothing better than a new set of paints!  Next I glued the poppy to the card.  Then cut out a butterfly I had printed on silk and put it on the poppy along with a pair of lips painted on a piece of paper towel.  If you know Terry Gilliam's work you will understand.   The lips were awful so I took them off.  Added antenna to the butterfly and one more is done!


ATC

ATC number 3


Where I live has no new bookstore.  We either order books or hope to find something at the used bookstores.  One bookstore sells any book for a dollar and the money goes to charity!  One time I was able to get a geography book that is dated 1897.  The book has some lovely maps so I photocopied the map for Japan which owned Formosa and Korea still.  First I glued a background from a Celtic clip art package to the card.  I copied an image from a Japanese art gallery to 50%,  Then tore the edges around the image and used Cosmic Copper on the edges.  Then for fun took a wing from the Celtic clip art and put it behind the image.  So I off set the map and glued it to the background.  Then cut out a postal seal from Japan and glued it to the card.  It is pretty but needs something more.  So I open the box of things!  I found Asian coins, Magic the Gathering cards, credit cards, clock shaped brads and wood laminate tags.  I decided on the clock brads and coins.  Pasted them over glue spots!  Done!  Not my favorite card but nice.


ATC

After making the cards I sprayed them with a spray pump hair spray to seal them.

So another challenge is finished.  Just three more to make tomorrow.  It was fun playing today but not the putting away of all the junk I dragged out.   I also wish the pictures came out better, Next time I will scan them, today the scanner was in use all day.

Everyone enjoy some crafting!

Sleepless and Helpless

Yesterday a friend lost her husband of 50 years.  It is such a helpless feeling knowing there is little you can do to help.  I am making a sympathy card for our crafting group to sign.  I hate doing crafting that is sad, but I need to do something.

Friday, June 22, 2012

Tool Box of Rassilon is Opened, or Accordion book Tutorial

If you know about Rassilon you have watched and read to much Doctor Who!  In the unending things that Rassilon has left behind I have his tool box!  In it I keep my bookbinding supplies and glues and tapes and the tuning fork to align the Eye of Harmony.  I'm sure Rassilon is still wondering where he left it.  Inside I found some projects including three sewn and glued books just waiting for covers.  I was supposed to teach binding books so I made some ahead.  It saves a lot of time and bookbinding shouldn't be rushed.

The past few days I have been collaging two 4 x 5 canvases to be the covers on a accordion book.  But it is a book with a secret.  This was in the book "Cover to Cover" but without instructions.  So with a little work I have created at least something similar.  They make wonderful gifts!

Previous Book spine.


Previous Book spine open.

Sorry about the pictures, the covers were a beautiful collage of Japan with Kabuki images from posters.  But basically the book is two covers with an accordion fold and held together at the spine with bias tape loops and a dowel.

When you remove the dowel you get a secret picture.  So today I will show how to make this easy, lovely book.

What you will need:

Two bookboard weight cardboard covers or I was lazy and used two 4 x 5 painting canvases.  Decorated as a collage or just a picture, whatever you like.   You can make the book as large as you want.

A piece of cardstock for the accordion part.  I cut mine 11 x 4 3/4.  It just looks nicer a little bit smaller in height then the covers. 

Bias tape or ribbons.  Something sturdy to make the loops.  They need to be strong to hold the book together and survive everyone wanting to see the secret.

Dowel or I like to use a chopstick.  You could even use a pen with a flower on top.  Decorated as you like.

Paper!  You will need to make signatures for the book.  I cut some pretty red astrobright paper just slightly smaller then my covers.  For this book I am making five pages to each signature.  (A signature is a set of pages that are folded together.)  So my book will have 80 pages when finished.

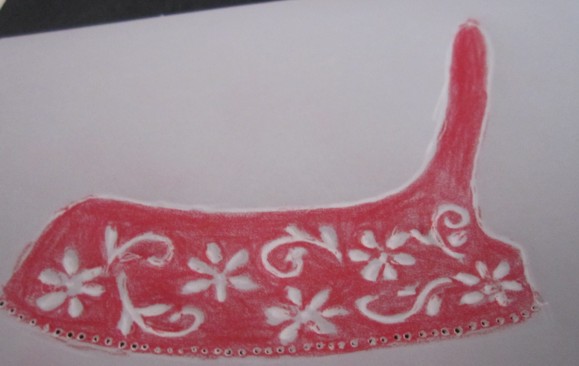
Secret picture, the size of the accordion cardstock minus one section of fold on each end. Actually I like it smaller then the accordion section so I can put a decorative paper behind the image.  Decorate as you want.

Small pieces of some coordinating cardstock.

Paper or cardstock for the inside of both covers.

Pieces of thread or ribbon and a needle, something that won't stretch.  This is to sew the pages together.

Padding to use when piercing holes in the paper.

Instruments of destruction.  The usual paper tools and glues.

So let's start!

The covers


 Book covers.

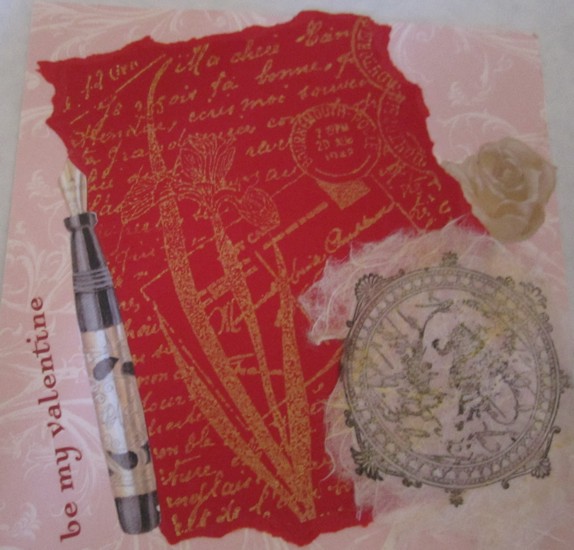
The covers are fun to decorate but if you cut you own bookboard make sure they match in size and they are straight.  These cover were made by gluing bright pink paper to the small canvases and then collaging on top.  I used paper doilies a fabric lace collar, mirrors, a flower cut out of thin aluminum, and Valentine cardstock images.  The covers are very dimensional.

While your covers are drying.  Next we can work on the accordion spine.  Cut the card stock the height of your book or a little smaller.  Fold accordion style every inch, making mountains and valleys.  Use bone folder or other tool to give sharp folds. 


Accordion fold.

Now it is ready to decorate.  You only need to decorate one side.  Take into your planning that first and last sections of the accordion are used to glue the book together.  I suggest using a paper smaller than the accordion piece anyway.  Once you have the decorative piece done glue it to the accordion fold.  Once it is dry use the bone folder on it again.  It has been my experience that decorating the accordion before folding the piece makes it harder to get crisp folds.

Next we make the signatures, they are really easy.  With the accordion decorated side down, count the valley folds,  then subtract two valleys and that is how many signatures you will need.  The first and last valleys are part of the structure and will not hold paper.  Cut the paper the height of the book by twice the width minus at least 1/2 inch for both.  For my book I have six valley folds so I need four signatures.  I wanted each signature to have 20 pages.  So I cut 5 pieces of paper 4 1/2 x 7 1/2 inches and folded each to
3 3/4 x 4 1/2 and placed them inside each other.  That gives me 20 pages.  Four signatures gives me 80 pages in the book.  It looks nicer if the signatures are pressed under a heavy object overnight.


Working on folding the signatures.

To sew the signatures I have made a change to the usual method.  I didn't want the sewing thread to show through the accordion image.  So I cut small pieces of cardstock 1 inch x book height minus 1/2 inch, for my book that is 1 inch x 4 1/2 nches, and I cut one for each signature.  Fold the pieces in half. 


Cardstock pieces for signatures.

Put a signature inside the folded piece, so the folds are together.


Cardstock and signature together.

Open the signature and place it on a foam mat.  Piercing through the fold all the pages and cardstock making two holes about one inch from the each paper edge.


Holes made in signature and cardstock.

Then with the thread and needle sew through the small piece of cardstock and signature so that the thread ends are inside the signature. 


Sewing the signature together.

Tie a knot or bow, this needs to be tight but not so tight you tear the paper.  Do this to each signature. 


Bow tied finishing the signature.

Once this is done glue the cardstock on the back of each signature to the accordion fold.  Remember to skip the first and last valleys.  Make sure the signatures are lining up top and bottom as you glue them in.  At this point I put extra glue on the first and last pages and glue the whole fold to make it looks neater.   Let them dry.

Back to the covers, decide which is the front and which the back.  Get the bias tape or ribbon and the dowel to close the spine.  Next you need to play a little with the tape to see how big the loops need to be.  They need to allow the dowel to go through but still close the spine tightly.  Now this is the tricky bit.  Turn the front and back covers decorated side down, with the front cover on the left and the back cover on the right.  Then take the tape strips and place them so the alternate on the covers. 


Playing with the bias tape making loops.

Put the dowel in the loop to help gauge how big a loop to use and cut them long so they are deep into the cover.  Once you have them lined up glue them to the covers.  Now let the whole thing dry, waxpaper and a weight is helpful.  While the book covers are drying think about the inside covers and how decorative you want them.  Now all the really scary parts are done!  I used a take away chopstick that I cut to size, I left it a little longer to make another surprise element for my book.


Lining up the bias tape.  Alternating so the
dowel can be woven in to close the spine.


Now that everything is dry we can finish the book.  Making sure the secret picture and covers are right side up, glue the first and last tabs to the accordion.  Make sure the according fold is even with the cover edge.  If you close the book make sure you have wax paper over the glued areas.  You don't want to glue the cover to a signature.  This is sometimes easier if you do one cover at a time.


Aligning the cover with the front section of the according.


Another view of aligning, you can see the loops on the edge.

One final step!  The inside covers of the book need to be made.  But first insert the dowel just to make sure the loops are right.  I've had to tear the cover off many a time to put in a new loop.  Luck is with me today, it is tight but I can get the chopstick into it.  Cut two pieces of paper or cardstock 1/2 inch smalller on the top and one side than the size of your covers.  If you use cardstock it helps cover up the ends of the tape loops a little better.  Doing one side at a time makes it easier.  I used some pink paper that says " I love you".  Got to keep it cute!  Done!


Book with chopstick spine closed.


Book without the chopstick.  Now you see the secret picture.


Front cover of the book.

Sorry this is so long but I wanted beginners to be able to use this tutorial.  If you find any problems with this please let me know.
Thanks for your time.


Thursday, June 21, 2012

Rug/Basket and Collage update

Well the rug has turned into a large basket!  It came out rather cute but the tension was to tight and caused the rows to go up instead of flat.  I learned a lot making the basket.  At first I wrapped four times around the cording which caused spaces in the basket.  It worked a lot better when only two wraps were used.  Also when wrapping overlapping by 50 percent caused fewer bald spots.  I used the slit method to connect the fabric strips together but didn't like the knots it left.  So instead I just wrapped the new strip over the end of the last strip.  This left some pieces loose so they will need to be secured with quilting cotton.  Now to decide whether to make a handle or not.  Need to figure out what I will use it for first.


Today I also started working on the paper that will go inside a Valentine /Victorian style accordion fold book.  The accordion is already made so I could finish it in a couple of hours.


Here is the back cover collage it took 10 minutes to do everything just jumped into my hand.  It has a fabric lace collar with crystals, aluminum die cut heart and diamond shaped mirrors.


Here are the two covers side by side.


Usually I collage the inside covers but a simple doily seems like it would be better since the covers are so decorative.  So tomorrow I will finish and post a tutorial.

Wednesday, June 20, 2012

First Day of a New Month

Wow!  I actually posted everyday for an entire month!  I've finished over 17 projects which is more than I usually do in a whole year.  Usually I work on large projects like the gray shawl, it has been nice to make easier and quicker projects.  It has also gotten easier to put down in words what I know and want to share.  Recently I realized that I have learned so many thing some of which are not commonly known and others almost lost to us.  So this blog gives me a way of sharing what I know.  My one wish is that someone will be inspired to try something new. 

Now to see if I can post another whole month!  The last few days I have been looking for projects to create and post here.  I have purchased enough crafting supplies to keep going the rest of the year or more. In particular I got out my paper making supplies.  The weather has been warm and pleasant enough to make paper.  A great way to cool off playing in water and being productive at the same time!  I also have a plan to make my first skirt, that should be good for a few laughs.  So I hope everyone reading this will keep coming back.

Today's project is what I messed up on yesterday.  I got out some heaver wire, this time 16 gauge copper and made a series of oval loops.  It wasn't what I was planning but I feel to will be lovely.  Once it was shaped I went back and started rapping a 26 gauge copper wire around the 16 gauge copper wire.  I played with the idea of changing to another color of wire but decided to use copper on copper.  It has been a bit dangerous because the wire can whip around and strike but I'm trying to be careful.  I wouldn't recommend trying this without eye protection!  Here is the pendant so far.


It is interesting how much this changes the texture and shine of the piece.  After it is done I will place crystal drops on it and then make a wired crystal for the necklace part.

Tuesday, June 19, 2012

Getting Ready for the County Fair

The county Fair is in a couple weeks and I need to find the projects and make sure the look their best for the fair.  The gray shawl lost some stitches and still needs to be starched.  It is really pretty, but discouraging that it lost a couple rows, but easy enough to fix.  It will be close to 60 inches in diameter when it is done.  I'm afraid they will move it to the doily category.  It is made from a doily pattern that called for size 40 thread but I used size 8 thread.  So it is a lot bigger than the original but still looks delicate.


Last year I got some rice flour so I might use a weak solution of that and then pin it on a board to dry.  Not hard but not a fun thing to do.  If I make enough I may use the leftovers to make some paste paper. 

Right now I'm working on a jewelry piece in copper and AB green crystals.  The first piece got damaged bending the wires and is now a pendant.  Sometimes the metal just gets overworked.  It was to be a much larger piece so this on might end up an earring.  Simple but cute.  Here is a picture.


Copper pendant with green drops,

Monday, June 18, 2012

Collage

Today I collaged a 4x5 canvas for a book.  The 4x5 canvases make it easy to make small books.  So much easier then cutting bookboard.  This canvas will become a Valentine themed accordion book.  I took picture after each addition so it shows the piece growing.